Friday, October 25, 2019

Lets talk dolls

Lets talk Dolls

My Daughters Doll

There is nothing like making something for your kid that they love with all their heart. I started making hats and each time I finished one for her she would wear it non-stop for months! She would sleep with the darn hat on most of the time. As she got older she started asking for different things and one day she asked me if I could make her a doll. I picked up this book at Joann's fabrics with a gift card I had gotten from my in-laws for my birthday or Christmas (I can't remember which), they know me so well.

www.amazon.com/My-Crochet-Doll


It wasn't until I got home and had time like a month later that I realized this book is in UK terms. Not a deal breaker in my book at all, just a little more paying attention. It took some doing and a lot of trial and error but I made this beautiful doll for my daughter. The hair was the hardest part. There are a few different ways to make a doll with hair and since it was my first I followed the book which has you crochet your head and then a cap in the color hair you want and sew them together and then add your hair. Putting her hair in took a little bit of figuring out and so many long nights with Netflix cutting and attaching yarn to this doll. She sure is beautiful and loved though! My little girl ran off with her as soon as I was done.


I'm not going to lie, this doll was naked for the better part of a year haha. I went to make a dress from the book but I couldn't figure it out since I was new to crocheting. I quickly gave up more then once. After a while I just got it together and crochet a dress without a pattern, I had learned a lot and came up with this stunning little yellow dress with pink details and pearl buttons in the back.  It was the dolls only dress for another good long while until my little one decided to start designing outfits for me to make for her doll. She drew up all sorts of outfits/costumes for her doll and I got so excited I just had to try. So I picked out a mermaid drawing she had done and got to work. The tail was a little tricky and is still bulky at the end but it fits and my kid loves it. The shell top just ties all up in the back so both pieces don't need any buttons or snaps. She has been asking me to make her more but I haven't had the time as of lately.

Second Doll for a Customer

As most of you know I run a small Etsy store and sell the fun little things I make. I good amount of the things I sell are custom orders and this was my first doll for someone. She contacted me about a blanket and a doll for her daughter. She wanted my favorite blanket, the fluffy meringue blanket in a soft pink after seeing the sea foam green one I had listed in the shop. We talked about the doll but she didn't have a really clear picture of what she wanted. We talked about the things her daughter liked and she gave me a great load of creative freedom with it. She mentioned her daughter loved bunnies so I got onto Ravelry and looked around until I found this pattern.

www.ravelry.com/bunny-girl


I really enjoy this pattern because the doll has shaped feet and thumbs on her hands but also you work one leg then the other and connect the two as you crochet the torso and continue with the head. All I needed to sew on was the arms and hair and hat. I had fun with the hair and hat and there is even a little round bunny tail in the back. I also applied some color to her cheeks and sent them to their new little owner to enjoy.

The Dobby Doll

I was contacted by an old friend, Her younger sister was expecting her first child and she was in charge of the baby shower. She wanted to see if I could make a Dobby doll from Harry Potter. I went looking but I hated the free patterns that were available and didn't want to have to pay for a pattern. So I returned to the above pattern and applied a few changed. First I did some color changes on the feet to make it look like little Dobby is wearing a sock. Second, the head had to me made separately and without a pattern so I could shape his nose. Its worked in rounds from the tip of his nose to the back of his head. I added ears and crochet him up a rag shirt to wear. Along with the doll I made a newborn sorting hat and a scarf in Ravenclaw colors using a simple moss stitch.


I really love making these delicate little toys. They are a challenge but also allow a lot of creative freedom, hair color, clothes selection, down to what eyes you give them. I look forward to my next project doll and hoping to squeeze in another one of my daughters drawn doll costumes.

Etsy

Head on over to the Etsy store and check out what is already done and ready for a new home. Don't see what your looking for or have an idea in mind? Let me know! I do a lot of custom work and can help make your idea a reality.

www.etsy.com/shop/LyssaLousCustomCraft

Facebook

Don't know exactly what your looking for and need some inspiration? Check out my Facebook page! It is filled with past project for you to look through and get some ideas.

www.facebook.com/LyssaLousCustomCraf

Monday, October 21, 2019

My Zelda theme baby nursery

My Zelda baby nursery

With your first child you buy all of the baby things. You scour Pintrest, reading every "must have" list and looking at magazine perfect dream nurseries you want for your baby. I remember with my first I bought the complete bedding set, it included sheets, quilt, curtains, a rug, one of those funny hanging diaper holders (that no one uses) and all sorts of stuff.  I also dished out money for anything I could possibly need and honestly ended up not needing half of it!

Second time around I wanted my sons nursery to be unique and filled with things I actually needed and things that would get used along with son cute pieces I couldn't resist. I also extra challenged myself and said I wanted to make as much of the nursery things as I could. Crazy with a 6 year old to get to and from school and dealing with morning/all day sickness.

Most of our nursery furniture came from Craigslist. It was a bit of a challenge finding wood stains that matched but we got there in the end.

Next came the theme, I know it sounds lame but I wanted a Pintrest style nursery on the cheap. My husband is a big game nerd and although I don't play many games (kids keep you busy) I always enjoyed watching the games being played. Together we decided on a Legend of Zelda themed nursery for our little man and I hopped back on Pintrest to look for more ideas.


Things I sewed for the Nursery

Fitted crib sheets In all actuality the bedding sets you buy are filled with things you don't need. I decided that rather then buy a set I would make exactly what I needed. Fitted sheets. Plain and simple. You need at least two but I really recommend three. The great thing about making them yourself is that you can find whatever fabric you desire, your options are limitless! I found one great Zelda fabric on Ebay and bought it up. I then found a second Zelda fabric I loved at Joann's along with a simple green fabric with a triangle design.

I looked over a few tutorials on Pintrest and got to work! with a little trial and error I completed three fitted crib sheets in a day! They are super cute and unique and totally make his nursery theme!

Changing pad cover
Along with his sheets I also made a changing pad cover out of the green fabric. Its a simple concept and I didn't follow a pattern. I took the idea of a pillow case (one of the ones that slightly overlap in the back) and sewed the largest button hole my sewing machine would do to create the openings for the straps to pull through.

Boppy Pillow and covers
I had some leftover squares from my corners of the fitted sheets so I sat around trying to figure out a way to use them. On my list of maybe useful things I didn't have with my first child was a Boppy Pillow. Man, are these pillows pricey!  So why not try sewing one instead of buying one. I followed a pintrest pattern but then changed the cover details. You make the pillow and then you sew different covers for it (which makes sense with how often little babies spit up or leak their diapers) So I made a pillow and sorta followed the instructions. I didn't like how my tutorial for the covers didn't have a zipper so, once again, with a little trial and error and a phone call to my sewing genius mom I ended up with a boppy pillow and two zipper closing covers, cotton on one side and minki on the other.


Things I crochet for the Nursery

Fairy Mobile
This is one of those things that I didn't have with my first kid and its really not important but I couldn't help myself, I had an idea and I just wanted to do it. It turned out amazing and was well used until my little man started sitting up and pulling himself up in his crib.


I used a dollar tree twig wreath, I have been looking for them since but the dollar trees around here don't seem to carry them anymore :(  I then had to crochet up some fairies! There obviously needed to be a cute blue one and the other two where mentioned by my husband. I also crochet really long leafy vines to wrap around the wreath and hang the mobile from. I used a free patterns on Ravelry for both.

www.ravelry.com/patterns/navi-the-fairy

I used a beautiful blue yarn for Navi. Then I made a yellow fairy and a red-ish purple fairy with a hand spun yarn I had on hand. The wings I crochet with an eye catching white yarn with a shimmery thread in it. My fairies turned out super amazing and my daughter asked for one so I made her a little pink one she could keep all to herself.

www.ravelry.com/patterns/little-leaves-4

These took some time and guesstimation on the length I needed but it came together wonderfully. I made three strands then wrapped them around my wreath with a little to hang down with the fairies and a lot on top to string up my mobile with.

Giant Cucco
So for those few of  you that don't know a cucco is just the word they use in Zelda for a chicken. This one was a challenge! The free pattern I found is for a rather small chicken but I wanted a big one to sit on the recliner in the nursery. I think I worked up this chicken three times with different yarn and hook sizes before finding the right one.


www.ravelry.com/patterns/golden-chicken-amigurumi

I used three different balls of yarn at the same time, two yarns where just your regular red heart brand white and the last yarn was this neat yarn with little tiny white loops throughout it. I thought it would give my chicken a slightly feathery look and I LOVE how it turned out. I used an N hook and for the body and the wings but dropped a hook size and used two yarn threads on the chickens beak, comb, and wattle.

Newborn Link hat, shield and sword
I wanted to do a cute little newborn photo shoot with this baby like I had with my first but I have learned a few things over the years and taking pictures was one of them so I figured I would take make his props and take his pictures when it was easiest for me.


www.ravelry.com/patterns/newborn-elf-hat-with-braided-tassel
Lets start with the little hat. I went with a pattern and followed it all the way through but it turned out rather small so I would suggest maybe upping the hook size with this pattern and then skipping the braided bit on the end of the hat.

The sword... oh man the sword. Well guys, I started out following a pattern and then I started changing things as I went and when your in the moment doing it you don't write this stuff down so sadly I can not remember what I changed or how I ended up with this cute little sword. I will link to the pattern I started following and I'm hoping in the future to come back and work a pattern for the sword I ended up with.
www.ravelry.com/patterns/sword

The shield is a pattern in progress, I made the pattern up and did actually write it down. So I need to work up my written pattern again and then get it onto the computer so you all can make little shields too. Bare with me guys, I'll get there.

I love this nursery! with a few well picked pieces of art and a lot of creativity it came together so beautifully. We have moved since having our baby and sadly our sticker wall quote didn't make it, but thats ok. I have three long large canvases I would like to paint the quote on one of these days when I get the time.

Etsy

Thanks for taking a look and head on over to my Etsy shop and take a look at what is made and ready to ship. If you see something you like here then let me know and I'll see what I can do about recreating it.

www.etsy.com/shop/LyssaLousCustomCraft

Facebook

Need some more inspiration?  Then check out my facebook page where everything I have ever crochet has been pictured. Don't see exactly what you were looking for? Let me know and we can make it happen. Lets get creative!

www.facebook.com/LyssaLousCustomCraft


Tuesday, October 15, 2019

Eevvee Ear headband (a piece of the costume)

Eevvee Ears

Over the years I have made multiple costumes for my daughter, not every year though, sometimes life gets in the way. She is eight and this will be the fourth costume I have made for her so I don't think I'm doing too bad. This year after some strong suggestion to not repeat costumes she decided to be an Eevve, a cute little brown fox looking Pokemon.

I got out my book and jotted down the pieces of her costume I though would be fun. I settled on a dress, cowl, ears, and a tail (There may be legwarmers if I have the time). Later on down the road when I have completed the costume I will come back and list and link all of the patterns and things I used. Not going to lie, there is no pattern for the tail. I worked that thing up four different times and right now its my enemy.


Anyways onto this ear pattern!

I used Red Heart Super Saver in a color called Cafe latte and a G 4.25mm hook. The ears are crochet in a round and folded down flat. There is no joining at the end of each round. SC increase means that you place 2 SC in the same stitch.

1. Magic ring and put 6 SC in the ring (6)
2. *SC increase, SC in the next Stitch* Repeat (9)
3-4. SC each stitch around (9)
5. *SC increase, SC in the next 2 Stitches* Repeat (12)
6-7. SC each stitch around (12)
8. *SC increase, SC in the next 3 Stitches* Repeat (15)
9. SC each stitch around (15)
10. *SC increase, Sc in the next 4 Stitches* Repeat (18)
11. SC each stitch around (18)
12. *SC increase, SC in the next 5 Stitches* Repeat (21)
13. SC each stitch around (21)
14. *SC increase, SC in the next 6 Stitches* Repeat (24)
15. SC each stitch around (24)
16. *SC increase, SC in the next 7 Stitches* Repeat (27)
17. SC each stitch around (27)
18. *SC increase, SC in the next 8 Stitches* Repeat (30)
19. SC each stitch around (30)
20. *SC increase, SC in the next 9 Stitches* Repeat (33)
21-22. SC each stitch around (33)

These two rounds will make your ear points on the sides. Make sure when you flatten your ears that your increase and decreases are your edges.

23. SC in the next 7 Stitches, place 3 SC in the next stitch, Sc in the next 15 Stitches, place 3 Sc in the next stitch, SC in the next 9 Stitches.
24. Sc in the next 7 Stitches, SC decrease the next 3 stitches together, SC in the next 15 Stitches, SC decrease the next 3 stitches together, SC in the next 9 stitches.

25-26. SC each stitch around (33)
27. *Sc decrease, SC in the next 9 stitches* Repeat (30)
28. SC each stitch around (30)
29. *SC decrease, SC in the next 8 stitches* Repeat (27)
30. SC each stitch around (27)
31. *SC decrease, SC in the next 7 stitches* Repeat (24)
32. SC each stitch around (24)
33. *SC decrease, SC in the next 6 stitches* Repeat (21)
34. SC each stitch around (21)
35. *SC decrease, SC in the next 5 stitches* Repeat (18)
36. SC each stitch around (18)
37. *SC decrease, SC in the next 4 stitches* Repeat (15)
38. SC each stitch around (15)

I like to finished with a slip stitch to your first stitch but you can finish however you like. Leave a long tail so that you can sew your ears to you headband.

Building your ears

Supplies needed
    your crochet ears
    a headband (I would try and find a thick out so you don't end up with top heavy ears)
    Pipe cleaners
    dark brown felt
    needle and embroidery thread

The headband I crochet a cover for so that I could easily sew my ears onto it, It also helps soften it so that it doesn't hurt my daughters head. This really depends on your headband. I got a thin one with teeth so I couldn't just crochet a tube and slide it on there. I had to crochet a small strip and then sew it onto my headband.

I placed my pipe cleaners in my ears around the edges to help support it. It took some tugging and shoving but I got them there and happy with how they came together. I then took an ear and drew an outline of it on some paper and drew the inner ear I thought would look good. When I got my paper to fit in my ear right then I cut my felt and used a back stitch to sew them on. Then I sewed them onto my headband and they are finished!

My ears are a tad bit top heavy and I will need to bobby pin them into my daughters hair but they are great.

Tuesday, June 13, 2017

Solomon's knot crochet shawl

Crochet Solomon's Knot Shawl

So my dearest husband bought me some yarn in an online action a few month back, it was nothing but a mix of different fun yarns, fuzzy yarns, and ladder ribbon yarns and such. I had no clue what to do with half this stuff but my husband started pulling up pictures of things done in these yarns and giving me ideas of things to make. He is so sweet.

After finishing a few larger projects I had on my list I went searching for a new short project and my hubby brought up using the fun yarn once more. I was uncomfortable crocheting an unknown pattern with a new yarn but with a lot of encouragement I took the leap and created this awesome shawl that I can't get over.


Free pattern in a different yarn and with no fringe.
www.joyfulabode.com/solomons-knot-shawl

Things I did differently

Obviously I used a different yarn then the given pattern. I used discontinued Lion Brand Trellis yarn in Champagne, about one and a half balls of it. Its tricky stuff to work with but after a little while you get use to it, find a way to make it work for you.

The pattern also doesn't have fringe or instructions. Its super easy to do though, so no worries. Just come up with how long you want your fringe to be. I wanted mine 8 inches so I doubled that and cut each strand at 16 inches. I put two stands in each Solomon's knot. Fold your strands in half, pull the loop through and then pull the ends through the loop and tight.


The stitch work is nice and open and the yarn provides this high fashion shimmer that I just love. It was a pretty easy pattern to follow and yes I did wet block the shawl before putting the fringe on. Thanks for looking and enjoy!

Etsy 

This shawl is now available in the Etsy store, Lyssa Lou's Custom Crafts. Hop on over there and browse the other things in the store while your there.

www.etsy.com/listing/crochet-trellis-yarn-high-fashion

Facebook

If you don't see anything you like in the Etsy Store then head on over to my Facebook page and look through the many other things I have made over the years.

Message me on either to Facebook or Etsy to create a custom order together.


Friday, June 9, 2017

Baby blanket with scraps!

Flower Garden Baby Blanket


Alright, its no lie, I have a ton of yarn. It fills every nook and cranny of my bedroom and overflows into my living room, taking up the side table and sometimes the couch. What a better way to use up the half balls of yarn I had all over then with a baby blanket!


Ravelry is my favorite and sometimes I just browse the free crochet patterns and save billions of patterns into my library. I happened upon this awesome pattern while looking through blankets for a friend after she just announced they were expecting a girl. She had already commissions a blanket from me and picked a pattern but I also wanted to gift her a blanket.

I quickly fell in love with the look of this blanket and her favorite color was purple so I gathered all of my purple (ish) yarns and got it going.

www.ravelry.com/kennedys-flower-garden-blanket

Things I did differently

Using a large variety of yarns I did have to use two different size hooks (G & H) to get the flowers to come out to about the same size. The thicker yarns got the smaller hook and the thinner got the bigger hook. Not too difficult, it helps to write down which one you used with which color though.

The pattern is written in a join as you go, making all of the flowers and then filling in the holes with the circle joins. Ok guys, watch what you are doing! This blanket ended up in the "time out" closet because I joined ONE flower incorrectly and I couldn't figure out how to fix it for quite a while.

Also, one last thing, the pattern doesn't come with the pretty little half joining circles it has in the picture. I didn't think much on it and just did my blanket without.

Wet Blocking

This blanket is important to wet block! The flowers like to curl up a tad, if you don't. I have a great little system that involves me pinning my blanket on top of towels to my carpet and steaming with a steam mop (It has a clothes steamer attachment that I love so much).

Not going to lie, this is one of the hardest blankets I have had to wet block. I pinned down every flowers petal before steaming it which probably took me a good half hour to do. Lets face it though, it was totally worth it!! It turned out so stunning!


This is a great project I really enjoyed working on and it uses up a bunch of scrapes. Think of all the color possibilities! A whole bunch of different colored flowers or just slight variations of the same color. I can't wait to make another, maybe in pinks, or perhaps reds! We shall see.

Thanks for taking a look and enjoy!


Etsy

Lyssa Lou's Custom Craft
The Etsy store is filled with fun creative handmade things, premade and ready to purchase. Head on over there and check it out.

www.etsy.com/shop/LyssaLousCustomCraft

Can't find what your looking for in the shop? Maybe head on over to my facebook page and look over what I have created in the past and place a custom order with me either through Etsy or Facebook.

www.facebook.com/LyssaLousCustomCraf


Thursday, March 30, 2017

Replace your dryer sheets with crochet!

Dryer Balls!

What a great idea! I loved that I would be replacing something I bought regularly, used, and then threw away. When I went searching the internet about dryer balls I really learned a lot. There are A TON of way to make dryer balls!! For people who knit, for people who are just DIYers. You can make them with yarn or some people dare make them out of old 100% wool sweaters. Great ideas, but I needed a crochet plan.


I stumbled upon a great blog post about dryer balls that, at the time, didn't have very good instructions for them. Good basic guild lines that I really didn't have a hard time adjusting to work for me. I made one pretty large maroon dryer ball for myself and then a few years later created three more for my in-laws. They loved them as much as I did! Not only that but my mother-in-law wanted to custom order a bunch from me. 36! Wow! 36 dryer balls was a lot.


When I went searching through my patterns again to find the dryer ball pattern I had used I couldn't find it. I did my project without searching for the first pattern I used. It took me so long to find that link above it was crazy, but it wasn't my only problem. I had to purchase new yarn and somehow calculate out 36 dryer balls. I needed a solid plan and a pattern I could do 36 + times over again and again. I bought two balls of 100% wool  Patons Classic Wool Worsted and experimented.

This pattern is made using Patons classic wool worsted weight yarn 100g and I used a variety of colors. Its what I used to make the pattern so its what I recommend.

Also used a 4.00mm hook

Lets get down to it

Take your yarn and starting with the outside strand wind it up into a good size ball, about the size of a small tennis ball. Keep your yarn nice and loose, If you wind it too tight then your balls will end up being a little on the small side for the ball cover pattern. Starting with the outside strand makes making your second ball a ton easier, just trust me guys.

When your done with the first ball then pull your center string and, you guessed it, wind it up into a nice little ball. Having both the balls side by side it was easy for me to adjust their sizes to get them both about the same size. Leave a nice long tail and weave it all over your ball. The longer the string the more you have to weave and the less likely your ball will come unwrapped.


Easy part over.

Crochet a cover

Keep in mind that you want your dryer ball to fit nice and tightly snug inside the covering.

1. Magic loop, 6 SC in magic loop (6)

2. 2 SC in each ST around (12)

3. *2 SC, SC next ST* repeat around (18)

4. *2 SC, SC next 2 ST* repeat around (24)

5. *2 SC, SC next 3 ST* repeat around (30)

6. *2 SC, SC next 4 ST* repeat around (36)

At this point I like to weave in my start strand (don't want to forget it!)

7-11. SC each ST around (36)

12. *SC decrease, SC next 4 ST* repeat around (30)

At this point place your wound ball of yarn into your covering

13. *SC decrease, SC next 3 ST* repeat around (24)

14. *SC decrease, SC next 2 ST* repeat around (18)

15. *SC decrease, SC next ST* repeat around (12)

16. SC decrease each ST around (6)

Weave your end through your six stitches and pull closed and weaved in end.

On To Felting

This is where the blog link from above comes into play, I did remember the felting method that she used and used it with these. Felting is a lot of work! I'll give you some basics of how I felt mine and then I'll give you some tid-bits of wisdom or you can head back to the blog I used. Down below is a link to her felting page.

prettystitches.wordpress.com/felted-wool-dryer-balls/felting


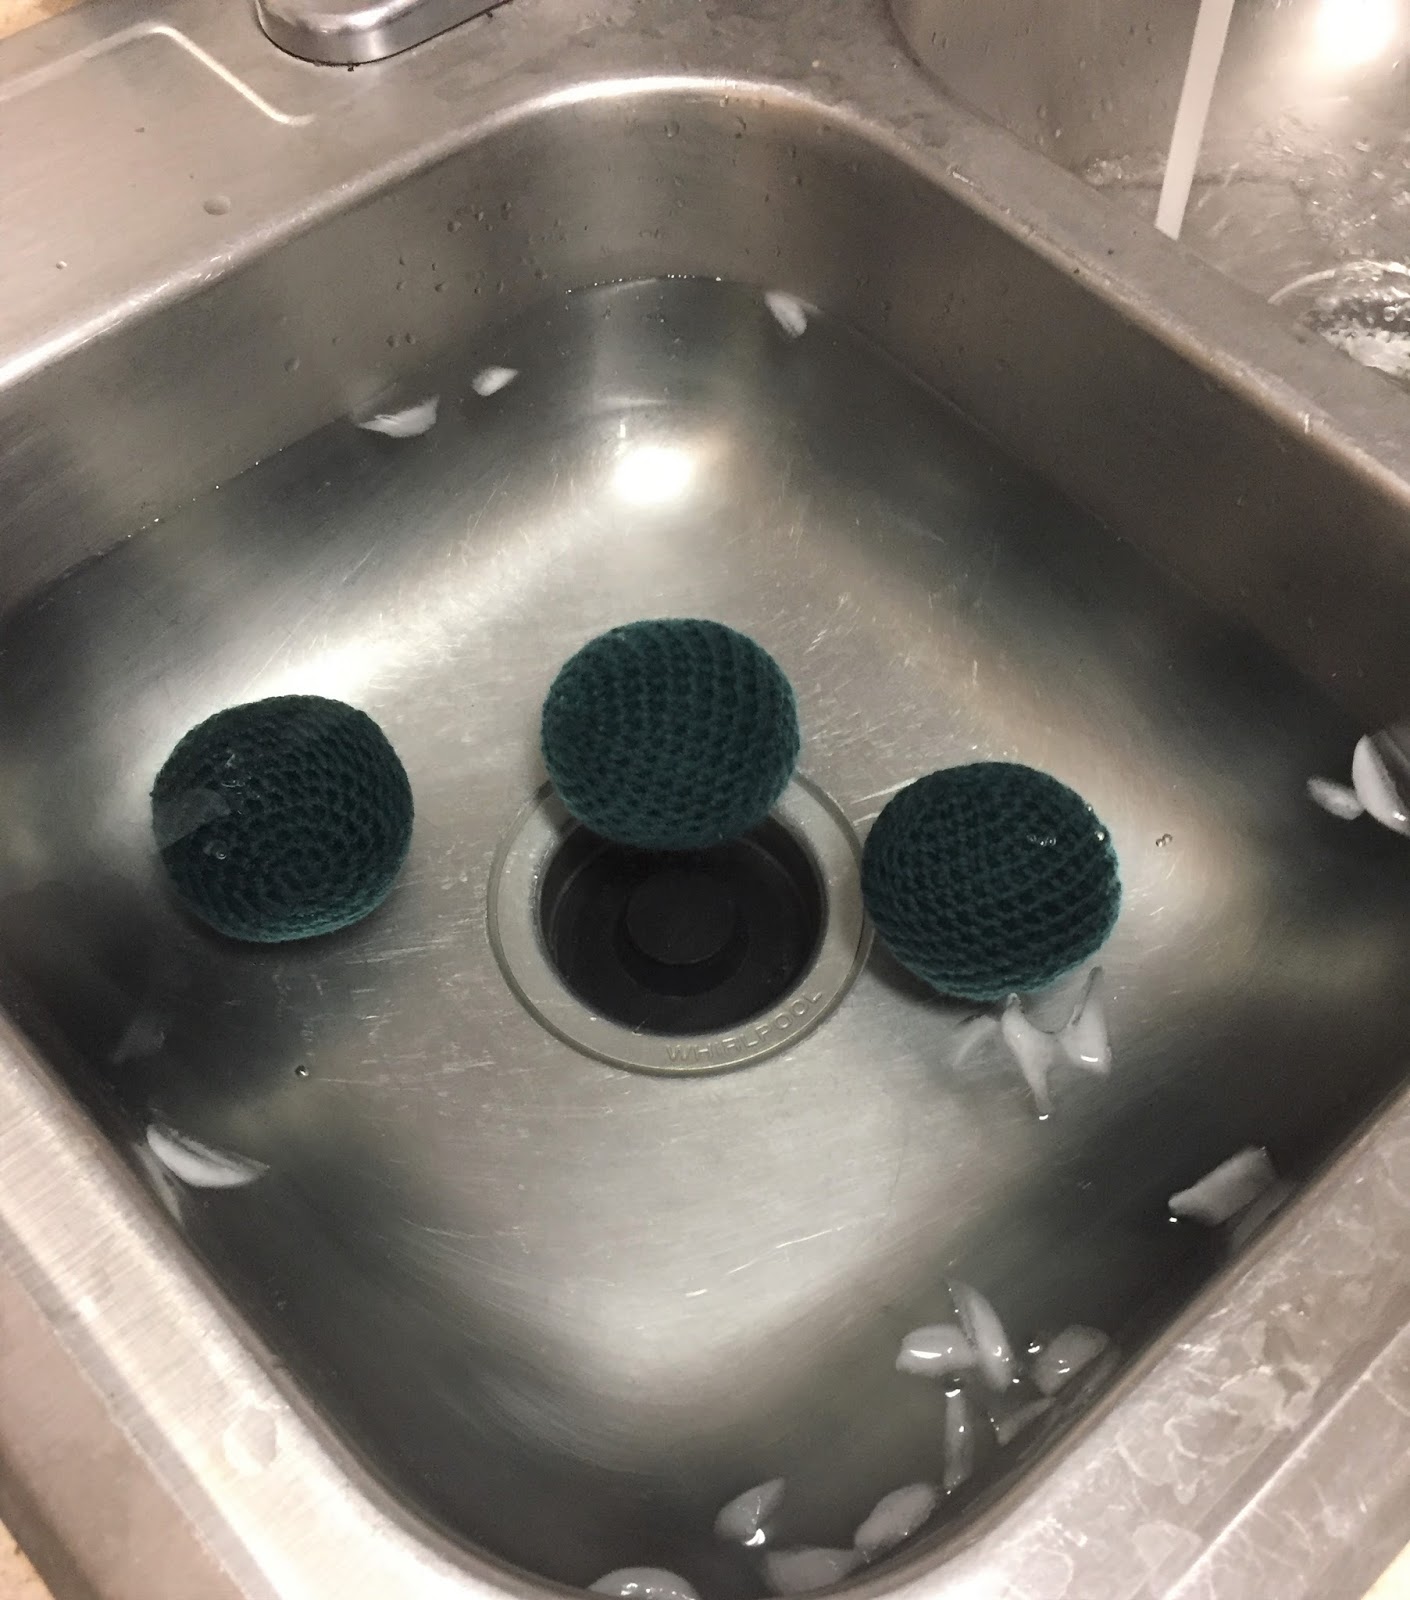
Alright, I am a cheater, I don't follow the whole process from above. I probably actually half it and let my dryer do the work over a LONG period of time. I boil a large pot and boiled all the balls of the same color. I hold them under the water with tongs to help them fill with the water. Let them boil for a few minutes and then throw them in an ice bath. This process is all about time. Let them sit in the ice water, I like to squeeze mine to fully empty the hot water from them and let the cold water completely in. Then repeat! squeeze out the cold water and throw them back into the boiling water to start all over. I do this probably four to five times. Then after coming out of the cold water for the last time I let them dry on a towel and rotate them to new dry spot or a new towel until they are dry. Then its off to the dryer!


Tid-bits of Wisdom

1. This boiling process comes with a certain smell. I imagine its what a hot wet sheep would smell like haha

2. Boil all the same color. Your water is going to draw a little bit of color from your yarn. DONT WORRY!!!! it doesn't mean your clothes will be colored in the dryer.

3. Don't expect great things right off the bat. Although I love dryer balls, the first few times of use there is still a little static.


picture of my boiling water after felting my maroon dryer balls


Overall

This was a long process to make 36! I won't be doing anymore in the near future. On a smaller scale a person could buy two balls of yarn and produce 3 dryer balls. Small batches are easy to make, I usually make my wound yarn while watching a TV show. The covering is a basic ball pattern in crochet, easily adapted for many other projects. Could be a very easy project for a beginner with little out of pocket cost (two balls and a crochet hook) and have a lasting result.

Head on out people and start making! Replace those dryer sheets that are slowly eating up your money.

Etsy

If you just aren't in for all the work then head on over to the Etsy Store, LyssaLousCustomCraft. I don't have dryer balls in the shop but please don't let that stop you from placing a custom order for your own personal set. While there take a peek around! you might see something you love!

Thanks for stopping by everyone and enjoy!

Happiness is Homemade!

Alyssa


Thursday, March 2, 2017

The Diamond Ghan Blanket

Diamond Ghan Baby Blanket

This is one of my very favorite patterns to work. It is a good easy pattern that doesn't need balls upon balls of yarn to make and is open and lightweight for warmer months. Pattern found for free over on Ravelry. Pattern has directions for different sizes and also give you the number of multiples (and extra) you need to make your own size. WARNING: Pay close attention to which row your working, can easily mix rows up.

Things I did differently

Even though the pattern comes with the different blanket sizes and instruction when I work up the chain for the baby blanket I knew it would be two small, my yarn and hook are smaller so I had to work off of the number of multiples given and measure my chain to about 40" plus the extra start stitches and start working. 


Baby boy blessing blanket

This is a baby boy blessing blanket I made for my cousin and her first baby. Due date was in August so I knew it needed to be a nice light blanket that wouldn't have baby overheating. Made using one ball of Bernat Baby yarn in white and it took a little under a month to make. The boarder I used is not included, its just something I made up as I worked around. 


Baby boy blanket in blue

My second diamond ghan blanket I made for my best friend in Florida who had a baby boy in November. Florida is hot most months. I remember it feeling cold to me in January, maybe Feburary but that was is. Keeping this in mind I came back to this light blanket pattern. Blanket made in Bernat Baby Yarn in Lavender marble, It just looked like blue instead, funny yarn color names. I tried to recreate the same boarder with color changes using some extra white yarn I had on hand. This one turned out a little bigger then anticipated (just means he can use it longer) and used about one and a half skiens of yarn and the scrap white yarn. I did make a mistake like 13 rows back and had to pull it out and rework and because of that it took me almost a month and a half to make. Worth ever minute! 


I haven't met the little man yet but I do get pictures! Here he is with his older sister enjoying his gift.
This makes the work worth it. I might not be there but I little piece of me is. 


Updates!

So far I have used this pattern six times and its still a pattern I consider first when wanting to make a baby blanket. 

After gifting the blue blanket to my close friend she asked if I could make the same one for her other two children. Turns out the babies blanket was being stolen by the other kids and loved on just as much. Oh I couldn't wait to try out this pattern for a girl and make another one for an older boy.

Yellow diamond ghan with a flower boarder

Problem with making blankets from your stash of yarn is you never know if you will have enough yarn to make what you had in mind. This was the case with this yellow blanket. I have no idea what type of yarn it is or how much was used. It came out short and looked more square then the rectangular shape I love. So I went looking for an awesome boarder I could use on just the top and bottom to elongate the blanket just a tad. Sorry to say I have no idea what happened to the pattern I used for the boarder. Maybe someday I will happen upon it again and attach a link. 


Grey big boys diamond ghan blanket

After the struggles I had with the yellow stash blanket I decided the next one needed to be made with a yarn I knew I could get at the store. I chose the Caron Simply Soft Yarn in a dark grey color. Turned out I had a ball or two of it in my stash and then got the other balls I needed from Walmart on the cheap. This one while being bigger was just as easy at the first few I created but took quiet a few move skeins. This one I did a color change boarder with between the grey and a black yarn I had on hand. It turned out great and these two kids LOVE their personal blankets!


Tri-color baby diamond ghan blanket

After a few years of struggling to get pregnant my husband and I found out we were expecting a little boy (due in February 2018). My mom also crochets and asked if I would like her to make a blanket and my answer was of course! I told her that there were all seasons here and I wanted to make a summer light blanket and she could make a winter heavy blanket for him. 

This blanket is just like the others I have made. Its created using Bernat baby yarn in a variegated yarn that has blue, green and white. The boarder is thick and made with a baby blue yarn I had in the stash and the bernat yarn. This one is pretty big and used a skein and a half and took me a while and even longer to get laid out and wet blocked (pretty sure I was 7 months pregnant or more lol). 


Little girls variegated baby blanket

This one is just from stash yarn. I had a few balls (4 if I remember correctly) of a beautiful Bernat baby yarn in variegated pink, grey, peach and white. It has been in the stash for a very long time and I decided to use it once finding out a new friend was expecting her third child, a little girl. I love making girly things! I did a different boarder with a matching solid pink Bernet yarn I had in the stash. All the yarn wasn't used and it is a much smaller blanket but it turned out so beautiful I can't stand it. 


Overall this is a great pattern that I love doing over and over again with different types of yarn and trying out different boarders. I highly recommend this pattern to anyone.

Etsy

Lyssa Lou's Custom Crafts
The Etsy store is filled with fun creative handmade things available for purchase. Head on over there and check it out. 

Don't have anything in the shop that your looking for? Maybe check out what I've created in the past by going to the facebook page. 

If you are interested in a custom item just let me know! You can message me through Etsy or on facebook.

Sunday, January 1, 2017

Cute little Pikachu!

Cute Little Pikachu!

My daughter is obsessed with Pokemon. She loves it along with most of the other children right about now, what with Pokemon Go coming out and what not. She asked for a Pikachu this Christmas but it turns out finding a cheap one is rather difficult so I decided I just needed to break out the yarn and make one up for her. Granted, I didn't finish it by Christmas and she was sad Santa didn't bring her one but my amazing husband told her that was because Santa knew mommy could make one. I came across this free pattern on Ravelry and got to work!

www.ravelry.com/patterns/library/pikachu-amigurumi


Rather easy pattern to follow, she has great pictures to help explain the complicated bits. My little one keeps telling me this little guy need a mouth and nose, might have to consider it. Would be an easy addition while in progress, a little embroidery thread and yea I could see it.

Things I did differently

There is one typo in the tail pattern on row 7, it reads, sc 2, skip 4, sc 2 (6) when it should read,
 sc 2, skip 4, sc 4 (6)


My kiddo sat up close next to me as a stitched limbs onto her precious Pikachu. She wouldn't leave its side and I'm honestly shocked I got a few pictures before she ran off with it to her room chanting "Pikachu!" as she went. A few days later and it is still in one piece and she is still enjoying it, she has informed me that now she needs a Squirtle to be friends with her Pikachu. Guess I better get on that.


This was a fun easy project that took me a few days total to work up and stitch together. Thanks for stop in and taking a look and enjoy!


Monday, November 21, 2016

Mermaid Tail of your Dreams

Mermaid Tail Blanket

A long time friend of mine contacted me after seeing a picture on the internet of a mermaid blanket. She loved them but they are expensive on Etsy and this friend is also 6 foot and some. Getting anything in her size is a challenge to say the least. She is such an amazing person and quickly gave me creative freedom and just asked not to make it overly girly (no pink). I still had a few balls left over from making Aryiana's halloween costume a few years back and some coordinating colors and went over to Ravelry to find a free pattern to work with.

www.ravelry.com/patterns/library/mermaid-tail-afghan


Blanket is worked from the top to the bottom with a shell stitch. Nice easy pattern to follow along and once you have it down its easy to work while watching tv and what not. I started alternating colors, the first few color change rows are too small and you have a hard time spotting them. After that I started doing three rows in each solid color so they would stand out.


Changes to Pattern

Blanket: This blanket is made to order so I needed it to measure 70" without the tail. The decrease is only 10 rows so I worked my blanket until it was 3-4" shy of 70" and followed the decrease pattern. I also added a shell picot edge to the top of the blanket and stitched it down.


Tail: After working up the tail pattern and attaching it to my blanket I took a step back and realized the tail was way too small for this huge blanket, I needed to make it bigger. I just worked a few rows of SC around the bottom and 3SC in the corners of blanket and added the same shell picot in blue to the tail.


Sure hope she loves it! This beast took about 10 balls of red heart yarn in Wildflower, Blue, Green and Light Blue and almost two months to complete. Shell stitches take a lot of yarn but they have the scale effect that I wanted. Such a great idea and pattern. Have fun with the color changes and decorative edges to make each blanket unique. I can't wait to start on a kid sized one for my little girl, she will love it!

Thanks for taking a look and enjoy!

Friday, November 18, 2016

For Those Baby Girl Toes!

Basic Baby Booties!

Baby shoes are something I never thought I could crochet. I have tried a few different patterns only to end up pulling them out or throwing them away in frustration. So when I found a pattern that had the word BASIC in it I had to pull out the yarn and give it another try. This is a great easy free pattern found on Ravelry, nice and easy to read. Both shoes are made the exact same way, there is no left or right until you put the embellishments on.

ravelry.com/patterns/library/basic-baby-booties


Here is my first pair made with mostly scrap yarn, in my favorite colors. All the yarn is Caron Simply Soft, in white, aqua and red. I also sewed on a small pearl. This pair doesn't have the leaf and flower feel at all.


Second pair of baby shoes made to match a baby blanket. Caron Simply Soft in white and purple, the green is heavier scrap yarn. This pair has the leaf and flower feel and I love that the Simply Soft Yarn has a pearly shine to it that matches the pearl in the flower center.


These baby shoes can be changed up so many was with just embellishments and colors. I cant wait to make some with petal flowers or buttons! So much fun. Thanks for taking a look. Check out the other posting around the blog and Enjoy!


Monday, November 7, 2016

Baby Blankets For All

For All The Babies!

Oh my gosh, I love babies, and everyone I know had a baby this year. Even before genders are known I'm searching over baby blankets I can make, saving them, and considering the yarn I would use. I started on a pattern I had my eyes on for a while after finding out a friend from Florida was expecting a girl in May.

This is a free pattern found on Ravelry. It is worked in a round from the center out and is so stunning that I had to make more.

ravelry.com/patterns/library/fluffy-meringue-stitch-blanket

Fluffy Meringue Stitch Blanket- Made using Caron Simply Soft yarn in the color Cream. This took 5 skeins of yarn and a little over a month to make.


Not only did I get to gift this beautiful blanket but my amazing photographer friend also requested a blanket from me. She sent me a photo and I got to go to a real yarn store for the first time!!!! I picked up some bright pink fiber and headed home to figure out what to do. After much trial and error I chose to knit my fiber with PVC pipe, rather difficult, and very new, but after a few rows I got it down. It was a totally new experience and it was so fun to make.

Fiber Knit Baby Blanket Photo Prop- 1lb 5oz pink fiber and took about two weeks to make.


After making the first fluffy meringue blanket and posted pictures I got a request from my grandmother to make another one for my cousin and his wife who was expecting their first baby girl. In our family we have a tradition to receive a blessing blanket for your first baby. Not the last blessing blanket made.

Fluffy Meringue Stitch Blanket- Made using 5 skeins of Caron Simply Soft in White and took a month to make. 

Honeycomb Baby Bonnet- Extra Caron Simply Soft in White. Works up super fast in less then an hour. 


So I couldn't help myself and had to make another one of these blankets and matching bonnet in whatever color I wanted. I picked a yarn I had a few balls of and work on it on a road trip. 

Fluffy Meringue Stitch Blanket- Caron Simply Soft yarn in Light Green, 5 skeins used and it only took two weeks with a lot of time in the car. 

This blanket and bonnet are available over in the Etsy store, Head on over there for easy purchase and quick shipping. 

After so many girly baby blankets I was thrilled to hear of a friend in Utah and his wife were expecting a baby boy. I looked through my yarn and pulled out my six skeins of vintage Caron Dazzle air yarn in a shimmering grey and some Red Heart yarn in black. I also made this cute baby a batman cape, hat and mask. 

Cluster Stitch Crochet Baby Blanket- Worked in Grey and black. Took a little over a month to make. Easy pattern and so many ways to make it look different.


Just sent off my most recent blanket to its new amazing little baby girl. A good friend from middle school and his wife just welcome their first baby. After seeing my other blankets she requested a blanket and we spent a good while picking out a pattern she liked and I got started. 

Mayflower Baby Blanket- Worked in Caron Simply Soft yarn in white. Blanket took 6 skeins of yarn and a little over a month to make. 


Baby blankets are so fun to make, I have another few in mind I would love to make and few more people expecting babies. Hope all the families enjoyed their blankets and new bundles of joy!